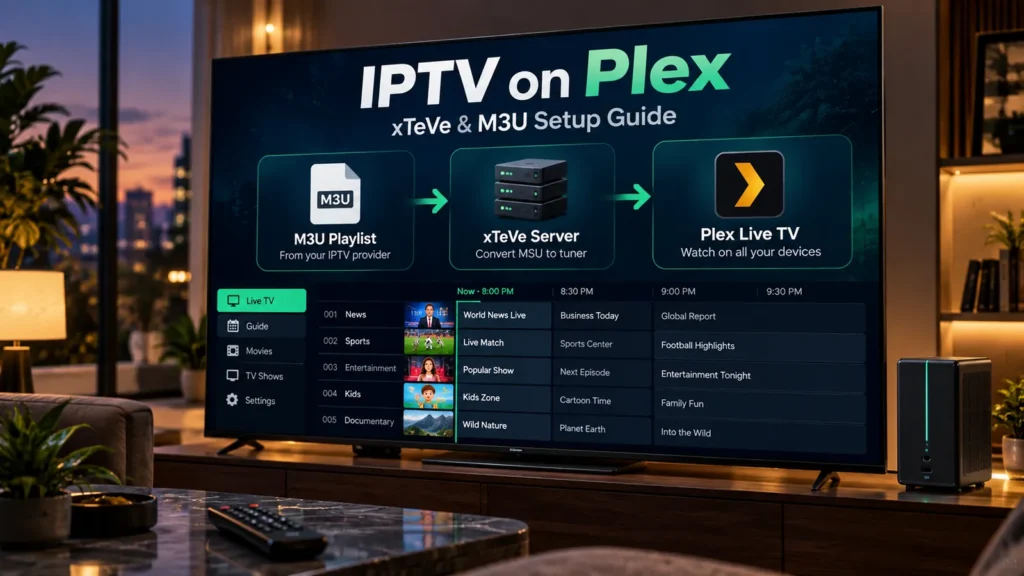
IPTV on Plex is possible, but it takes a little more work than opening an IPTV app on your television. If you already use Plex to organise your movies and shows, you may want to bring compatible live TV streams into the same interface. That’s where a third-party tool called xTeVe comes in.
xTeVe takes channels from an M3U playlist and presents them to Plex as a virtual TV tuner. You still need a working Plex Media Server, a compatible playlist and the right configuration. This guide walks you through the setup, explains where things can go wrong and helps you decide whether it’s worth the extra effort.
How Does IPTV on Plex Work?
Plex has its own Live TV features, including free ad-supported channels and support for compatible TV tuners. However, it doesn’t offer a standard option for importing an external M3U playlist directly into its Live TV interface.
For this particular setup, xTeVe acts as a bridge between your IPTV source and Plex. It reads your playlist, lets you choose which channels to keep and makes those channels available through a virtual tuner that Plex can discover.
If your source also provides XMLTV data, xTeVe can help connect the channels to an electronic programme guide (EPG).
Think of the process as three separate parts:
- Your IPTV source supplies a compatible M3U playlist.
- xTeVe processes the playlist and presents a virtual tuner.
- Plex discovers the tuner and displays the configured channels through Live TV & DVR.
One important detail: xTeVe is an independent project, not an official Plex feature. That means updates to Plex, your operating system or the streaming source can sometimes affect compatibility.
What You Need Before Starting
Before setting up IPTV on Plex, make sure you have everything ready. It’s much easier to check compatibility now than to troubleshoot a half-finished installation later.
- A computer or compatible server running Plex Media Server.
- An active Plex Pass for the xTeVe-based integration described here.
- A Plex client with Live TV & DVR support.
- xTeVe downloaded from its official GitHub repository.
- A compatible M3U playlist containing streams you are authorised to access.
- An XMLTV programme guide if you want to use xTeVe’s XEPG feature.
- A reliable connection between Plex and the device running xTeVe.
Your Plex server and xTeVe must be running whenever you want to use this setup. If either one shuts down or loses its network connection, your channels may stop working.
You don’t need a dedicated server computer to experiment with the setup, but leaving everything running on a laptop that regularly goes to sleep can become inconvenient.
How to Set Up IPTV on Plex with xTeVe
The process below covers the main steps. The exact menus may differ slightly depending on your installed versions of Plex and xTeVe.
Step 1: Get Plex Media Server Ready
Start with Plex Media Server. If you already use Plex for your own media library, check that the server is running and available through the Plex Web App.
Otherwise, install Plex Media Server on a supported computer or server, sign in and complete the initial setup.
Make sure your Plex account meets the xTeVe project’s requirements, including Plex Pass. Also check that the Plex device you’ll use supports Live TV & DVR.
Step 2: Download and Launch xTeVe
Download xTeVe from the official xTeVe GitHub repository. Choose the appropriate build for your operating system and follow the project’s installation instructions.
When you launch xTeVe, its console displays the address of the web interface. Open that address in a browser on your local network.
The default port is commonly 34400, although yours may be different if you’ve changed the configuration. Use the address displayed by your own installation rather than copying an example from another computer.
Step 3: Set the Number of Tuners
During the initial configuration, xTeVe asks how many tuners to make available. This determines the number of simultaneous streams your setup can handle.
Start with a conservative number. If your IPTV source allows only one connection, don’t configure several simultaneous streams and expect them all to work.
You can revisit these settings later once the basic setup is working.
Step 4: Choose Your EPG Configuration
The next important choice concerns your electronic programme guide.
xTeVe provides options for handling programme-guide information. If your source supplies a compatible XMLTV file and you want xTeVe to manage channel mapping, you can use its XEPG feature.
XEPG requires an XMLTV source. If you don’t have one, review the alternative EPG configuration described in the official documentation before continuing.
You can find the available options in the official xTeVe configuration guide.
Step 5: Add Your M3U Playlist
Now add your M3U playlist to xTeVe. You can use a compatible local file or a remote playlist URL, depending on what your authorised source provides.
Enter the correct location, save your settings and check whether xTeVe successfully loads the playlist.
If the playlist fails to load, check for typing errors, expired credentials or a network problem. Try to establish that the original playlist works before changing more complicated settings.
Keep your playlist URL private. Some URLs contain account information that could give someone else access to your subscription.
Step 6: Filter and Organise Your Channels
This is a good opportunity to keep your channel list manageable. If your playlist contains hundreds of channels but you regularly watch only a few dozen, you probably don’t need to send every single one to Plex.
Use xTeVe’s filtering tools to select the relevant groups or channels. For your first test, choose a small selection of channels you know should work.
Once they’re running correctly, you can expand the selection without having to troubleshoot a huge playlist at the same time.
Step 7: Map Channels to the Programme Guide
If you’re using XEPG, open the channel-mapping section. Assign each active channel to the correct entry in your XMLTV guide.
Some channels may be matched automatically when their identifiers agree with the XMLTV data. Others need manual attention.
If a channel doesn’t have programme information, xTeVe also provides a dummy guide option. Follow the project’s instructions to assign the appropriate entries and save the mapping.
Check that the channels you want are active before moving on to Plex.
Step 8: Connect xTeVe to Plex
Open Plex Web App and go to Settings > Live TV & DVR. Start the DVR setup process and allow Plex to search for compatible tuners.
If Plex discovers xTeVe, select the virtual tuner and continue through the setup.
If it doesn’t appear, use the manual device-address option where available. Enter the local DVR address shown in xTeVe, making sure the Plex server can reach it.
This is especially important if Plex and xTeVe run on different computers or in separate Docker containers. An address that works in your own browser won’t necessarily be accessible from the Plex server.
Continue through the channel and guide configuration, then save the setup.
Plex explains the standard tuner discovery and configuration process in its official Live TV & DVR documentation.
Step 9: Test Your Channels
Open Live TV on a supported Plex client and try a few of the channels you’ve configured.
Start with one channel and let it play for several minutes. Then try channels from other categories. This gives you a clearer picture of whether the setup works consistently.
Check the programme guide too. If the channels play correctly but the schedule is missing or inaccurate, return to your XMLTV source and mapping settings.
Once everything works, you can add more channels and adjust the configuration to suit your preferences.
Do You Need Plex Pass for IPTV on Plex?
For the xTeVe integration covered in this guide, the project’s published requirements include Plex Pass, Plex Media Server and a compatible Plex client with DVR support.
This is different from Plex’s ordinary antenna-based Live TV functionality. Plex explains that watching broadcasts from a compatible antenna and tuner can be free, while recording broadcasts requires Plex Pass. If you’re comparing recording with replaying a past broadcast, our IPTV catch-up explainer covers how catch-up differs from DVR.
Don’t assume that purchasing Plex Pass automatically makes any M3U playlist compatible. You still need xTeVe, a working source and the correct configuration.
Common IPTV on Plex Problems and How to Fix Them
Even when you’ve followed every step, things don’t always work on the first attempt. Start with the simplest checks before reinstalling software or changing your entire configuration.
Plex Cannot Find xTeVe
Check that xTeVe is running and that its web interface is accessible. Confirm the local IP address and port, and make sure Plex can reach the computer or container hosting xTeVe.
A firewall or container networking issue can also prevent discovery. If automatic detection fails, try the manual tuner address when your Plex version offers that option.
Your Playlist Loads but Channels Are Missing
Open xTeVe and look at your filters and channel mapping. You may have accidentally excluded a group, or the required channel may not have an active guide assignment.
Save any corrections and refresh the lineup. It’s worth checking xTeVe’s logs if the missing channels still don’t appear.
The Channels Appear but Won’t Play
Test the original authorised stream in a compatible media player. If it also fails outside Plex, check the source, network connection and account details first.
If it works outside Plex, the issue may involve the stream format, the Plex client or xTeVe’s buffering configuration.
xTeVe offers buffering options for certain setups, but these can introduce additional processing demands. Read its documentation before changing them.
The Programme Guide Is Empty
Check that your XMLTV file loads successfully and contains data for the relevant channels. Then review the channel mapping in xTeVe.
If the identifiers don’t match, you may need to assign some channels manually. Save the mapping and refresh the guide after making changes.
Playback Keeps Buffering
If several channels buffer, test your internet connection and local network. Where possible, connect your server by Ethernet rather than relying on a weak Wi-Fi signal.
If just one channel buffers while the others work normally, investigate that particular stream before changing the rest of your setup.
For more technical troubleshooting, use the xTeVe troubleshooting documentation.
Is IPTV on Plex Better Than a Dedicated IPTV Player?
That depends on how you like to watch television.
If you already run Plex Media Server and enjoy organising your own media library, adding compatible live channels to the same environment may appeal to you. You get more control over channel filtering and guide mapping, provided you’re comfortable maintaining the extra software.
But if you simply want to turn on your TV and start watching, a dedicated IPTV player is usually less complicated. You don’t need to keep xTeVe running or manage a separate virtual tuner.
We have two other guides if you’d prefer that approach: setting up IPTV on Firestick and using IPTV Smarters on Samsung TV.
The most practical setup is the one that works reliably with the devices you already own and doesn’t require more maintenance than you’re comfortable with.
Will Your M3U Playlist Work with Plex?
Not every M3U playlist will work with every IPTV on Plex configuration. The playlist must load in xTeVe, the individual streams need to be playable by your setup and any connection limits must be respected.
Before choosing a subscription, ask whether the provider supplies an M3U playlist and whether its streams are compatible with third-party software such as xTeVe.
It’s also worth asking about XMLTV availability, simultaneous connections and any restrictions that could affect your setup.
If you’re still comparing services, our guide to choosing an IPTV OTT provider explains what to check before committing to a longer subscription.
If you’re considering a subscription, explore the Zelyvon TV homepage for current plans and check our channel list. Ask our team about M3U and xTeVe compatibility before ordering rather than assuming every player and server configuration will work.
Frequently Asked Questions
Can I add an M3U playlist directly to Plex?
Plex doesn’t provide a standard, native option for importing arbitrary M3U playlists into its Live TV interface. xTeVe is one third-party approach that presents compatible streams through a virtual tuner.
Does xTeVe need to stay running?
Yes. For this integration to work, the computer or server running xTeVe must remain available, along with Plex Media Server and your streaming source.
Can I use IPTV on Plex without XMLTV?
That depends on your EPG configuration. xTeVe offers different programme-guide options, while its XEPG feature requires an XMLTV source. Check the official configuration guide before choosing the appropriate method.
Why does a stream work in another player but not Plex?
Different players can handle different stream formats and network conditions. If the original stream works elsewhere, review your xTeVe settings, the Plex client and any relevant compatibility limitations.
Can I use Plex on several devices?
Plex supports a variety of client devices, but the availability of Live TV & DVR features can differ. Your actual number of simultaneous IPTV streams may also be limited by the source and the number of tuners configured in xTeVe.
Keep Your Setup Secure
Only connect streams you’re legally authorised to access. Using Plex or xTeVe doesn’t change the licensing status of the content.
Keep private playlist URLs and account credentials out of public screenshots or support discussions. Unless you have a specific reason and know how to secure it, avoid exposing the xTeVe management interface directly to the internet.
Official Sources and Further Reading
- Plex Support — Live TV & DVR Setup
- xTeVe — Official GitHub Repository
- xTeVe — Configuration Guide
- xTeVe — Troubleshooting Guide
Final Thoughts
IPTV on Plex can make sense if you already have a media server and want compatible live channels alongside the rest of your media. The key is to get the basic setup working before experimenting with large playlists, advanced filtering or additional connections.
Start with a few channels, check your programme guide and keep your xTeVe configuration manageable. If the additional maintenance doesn’t suit you, there’s nothing wrong with choosing a dedicated player for everyday television instead.